Working with the Contacts and Leads sections
* The next cheapter refer to both sections
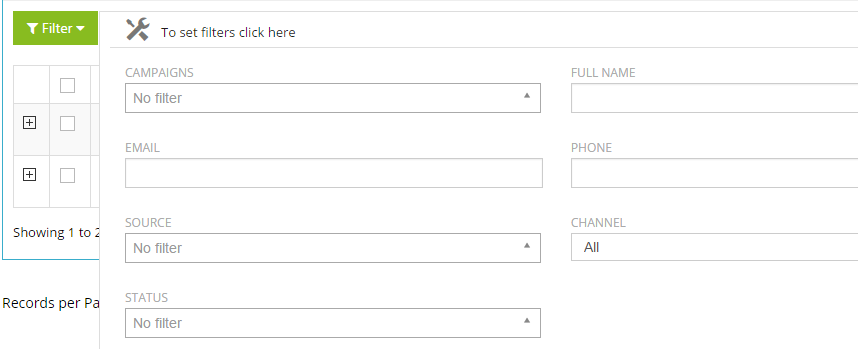
Step 1: Working with filters
First, you can filter and organized the table by your needs.
at the  button you can see the filtering parameters
Clicking on the 'set filters' will show you all the brand filter options.
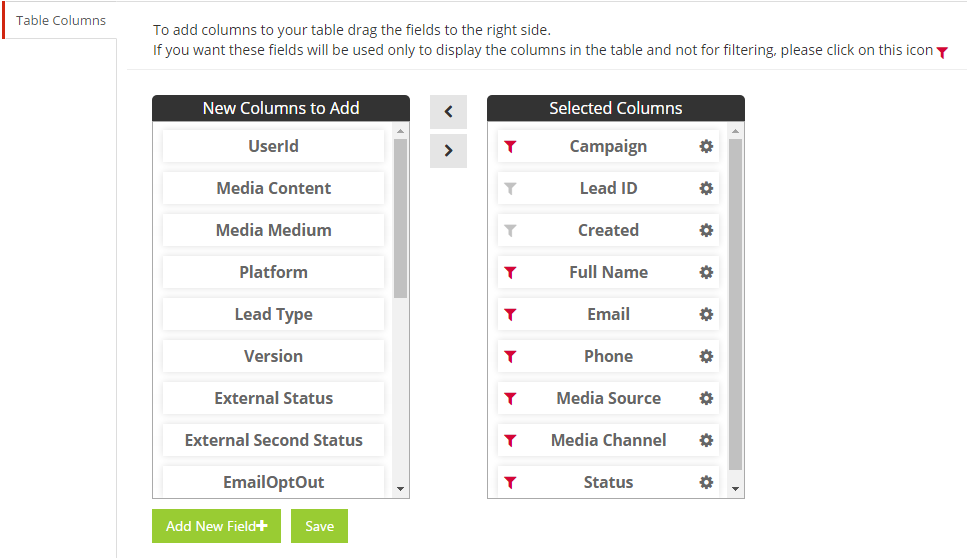
On the left column you can see all the filter options the brand currently have.
on the right culomn you can see the filters that set's for this campaign.
on every row there's a  icon, by default it will be red, means that this filter is on amd you
will be able to see it at dropdoan when clicking on 'Filters'.
icon, by default it will be red, means that this filter is on amd you
will be able to see it at dropdoan when clicking on 'Filters'.
you can drag filter you want to add from the right to the left column or use the arrows buttons between the columns.
if you want to add a new filter to the filter options you can click on the  button, an add filter menu will pop up,
you can add a date/free-text/multi-select/drop-down filters.
button, an add filter menu will pop up,
you can add a date/free-text/multi-select/drop-down filters.
Note: table can hold up to 10 filters, any other filter will be shown under the (+) next to each record.
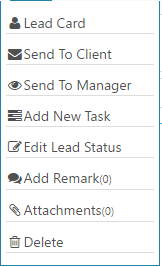
Step 2: Record menu
To the right of every record there's a 'Record menu' marked with the  icon.
icon.
it hold in it a few more advanced options you can do with this record.
Step 2.1 : Lead/Contact Card
Let start with icons on the top of the page
![]() - Click on the icon will make a call to this contact.
- Click on the icon will make a call to this contact.
![]() - Click on the icon will send an SMS to this contact.
- Click on the icon will send an SMS to this contact.
![]() - Click on the icon will send an email to this contact.
- Click on the icon will send an email to this contact.
![]() - Click on the icon will delete this contact.
- Click on the icon will delete this contact.
If you want to edit that info of the card use the  icon.
icon.
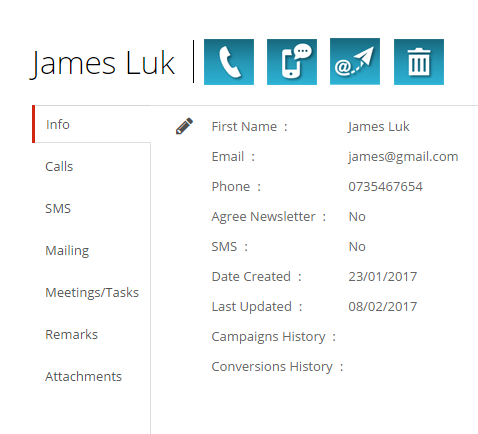
Calls - all the calls are recorded and saves, you can listen to the calls, download it or send a link with the call.
SMS - here you can see the history of all the SMS that has been sent to the record.
Mailing - here you can see the history of all the emails that has been sent to the record.
Mailing/Task - here you can see the history of all the tasks that has been created for record.
Remarks - here you can see the history of all the Remarks that has been made for the record.
Attachment - here you can see all the files and Attachments of the record.
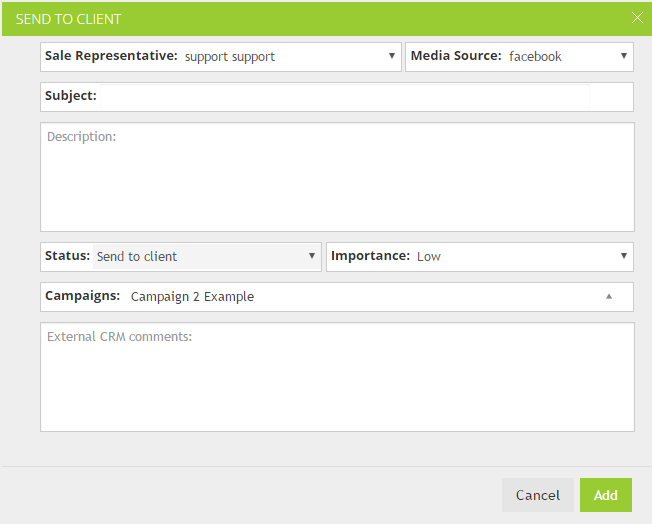
Step 2.2 : Send to client
If you already created a conversion type status that sends the record to the advertiser, you will have this option at your menu.
* Read more info about creating status Here.
most of the info like representative name, media source, status, and campaign will be already filled from the info at the system, those can be changed,or added.
the rest should be filled by you.
clicking on the  will send the record to your client.
Note: sending setting will be made at the 'Tools' menu, you can read more about it Here.
you can also create an Intermediate point between the client and the represantative, you can create a 'Send to manager' conversion type status, in this way, manager will be able to check every sending before it gets to the client.
Note: 'Send to client' and 'Send to manager' will send the same record to the conversion tab.
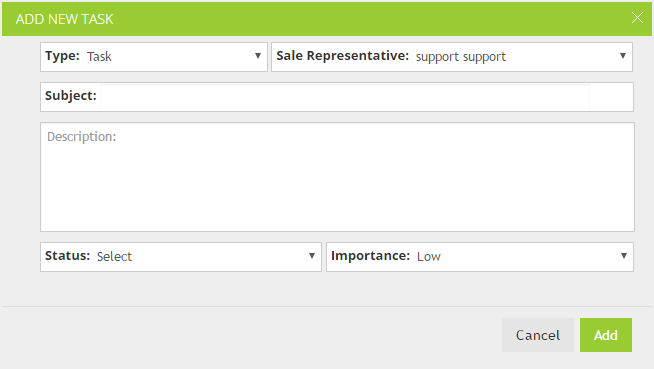
Step 2.3 : Add new task
You can create different types of tasks:
- Task - regular task
- Meeting
- Comment
- Call
notice that a task with date and time will send a notifcation near the time scheduled for it at the  icon at the top bar, it will also add the new task to the 'Task' tab.
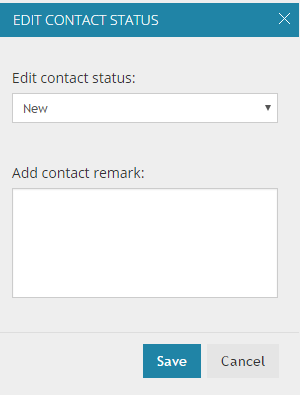
Step 2.4 : Edit lead status
Here you can change the record status.
Note: when the record status is lead or contact and not yet a conversion - praimery status show the general status of the record,
the secendery status is more info about the the primary status.
* read more about 'Status area' Here
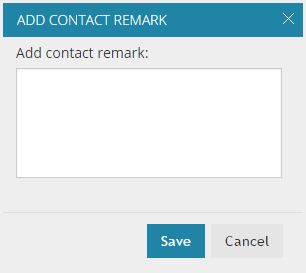
Step 2.5 : Add remark
Here you can add a new remark to the record, you can see the remark at the Lead/Contact Card.
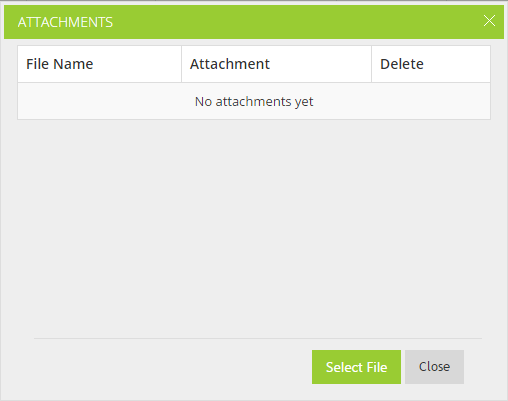
Step 2.6 : Attachments
Here you can add any file you want to the record.
you will be able to see al the files under the 'Attachments' tab at the contact/lead card.
Step 3 : Importing excel file
With the  button you can import new records to the table.
you can download the example file, load all your content to it and upload it.
Importent:
- File must have a '.xls' extension only.
- The excel tab name must be like the example file.
- The columns at the file must be like the parameters at the table.
At the 'Leads' table a new imported record that have the same number and email will get 'Duplicate' status by default.
at the 'Contacts' table a new imported record will merge with the one who already exist at the table and a ![]() icon will appear next to it.
icon will appear next to it.
Step 3.1 : Add new record
With the  button you can add a new record to the table.
Step 3.2 : Incoming calls
and the  will redirect you to the 'Incoming calls' tab at the system.
at the 'Incoming calls' tab you can use the  to locate the contact by phine number.
Step 3.3 : Export records
With the  you can export the table with the filters you set at fillter settings.
Step 3.4 : Action for selected records
at this dropdown menu you can preform actions on several records at the same time, all you need is to select all the records you want to preform the action on (by marking the checkbox at the left of each record) an choose the action.
Action options are:
Move to history: move all selected records to archive.
Send SMS: send sms to all selected recoeds.
Send email: send email to all selected recoeds.
Email marketing export: if you have 'Publicators' account, you can move all records there with a click.
Add to segment: create new segment that describe the choosen records.
Update status: update the status for all selected records.
Allocate to representative: allocate all the selected records to a specific representative.